
Guitar Frets: How do I properly clean and polish my frets to a mirror finish?
Yesterday I noticed that the frets on my acoustic guitar were looking way past their best and had lost their luster. It still plays like a dream, but the frets are just looking tired and need a little bit of sprucing up.
So here we are going to put the shine back onto those frets and walk through the process of doing so. The method we will cover will work even for the dirtiest of frets. You can even follow this guide if you want to bring rusted guitar frets back to their best.
For rusted frets, you will have to use a bit more effort and possibly repeat the process a couple of times. This process will work on both acoustic and electric guitars.
If you are new to guitar maintenance, this is an ideal first project. It is a simple bit of DIY, and you do not need to visit a professional to achieve results.
The Guitar – Epiphone Dot Studio in Ice Blue
So the guitar that we will work with is an Epiphone Dot Studio of mine that also needs some fret care (I did the acoustic before it occurred to me that I should write an article on it and take some photos).
The guitar has been sitting in its case in storage for some time. So it has not benefitted from any maintenance and could probably use a setup too. We will do a longer article on doing a full guitar setup later on, and the link will appear here when it is ready.
The Guitar Frets
The frets on the guitar may not look too bad in the photos, and my camera certainly isn’t helping, but they are a dull grey color when they were once a shiny chrome.
This loss of the natural shine of the chrome is because of the years of playing the guitar and putting it back in its case without wiping off sweat when finished. A bad habit I try to avoid these days.
Polishing Guitar Frets Quickly
There are several approaches we can take if we want to clean and polish our frets. The approach that we take will be dependent on the condition of the frets. How dirty/rusty they are.
We’ll start with the most straightforward method, which is suitable for frets that are looking ok but need a nice shine put back on them. For this, we are going to use some metal polish and a set of fret guards. These will enable us to work the full length of the neck, hitting every fret in quick succession.
Tools
So next, we’ll take a look at the list of the tools and resources we’re going to need for this job. You can use alternatives to the ones listed here, but these are the products in our workshop.
We only recommend products we use and have tested in our day-to-day work. So we do recommend these and have had no problems with them.
- Frine fret polish
- Fretboard guards
- Microfiber suede cloth (for applying polish)
- Soft cotton cloth or towel (for buffing-off the polish)
So we’re going to be using the Frine Fret Polishing Kit, which comes with everything we need to clean and polish our frets. We have added a cloth, but you can work without this addition. We use it to wipe away the polish at the end. The kit comes with a microfiber cloth, and you can use this to both apply and remove polish.
The kit includes three fret guards of varying sizes. You won’t need to use all three on your guitar. Just the one that best fits the fretwire on your guitar neck. Fretwire thickness varies between manufacturers and the type of instrument.
This article from lutherie.net contains some information on the various thicknesses of fret wire available.
The Method
- Remove the guitar strings.
We’re going to need to be able to access the frets. So the very first step is to make sure we can do that by removing all of the strings.
- Add fret polish to the cloth.
So once the strings are off of the guitar, and we have unobstructed access to the frets, we are going squirt a small amount of the Frine polish onto the microfibre cloth.
You don’t need a lot of stuff. Try to add no more than a pea-sized amount.
- Use the correct sized fret guard on the 1st guitar fret.
At this point, we choose from the three sizes of fret guard. There will be one that fits your fret wire. You want to choose the one with the slot that has the tightest fit over the fret.
I have thick fret wire on this Epiphone guitar, so I will be using the fret guard that has the largest slot. The guards have a built-in curve and should lay flush against the fretboard.
If you don’t have a fret guard, you can use the traditional method of taping the fretboard with some masking tape, like so:
When using tape, ensure you tape the fretboard before adding polish to the cloth. If you find you have got some polish on the fretboard using either method, then wipe it away using the microfibre cloth.
- Rub the polish onto the guitar frets.
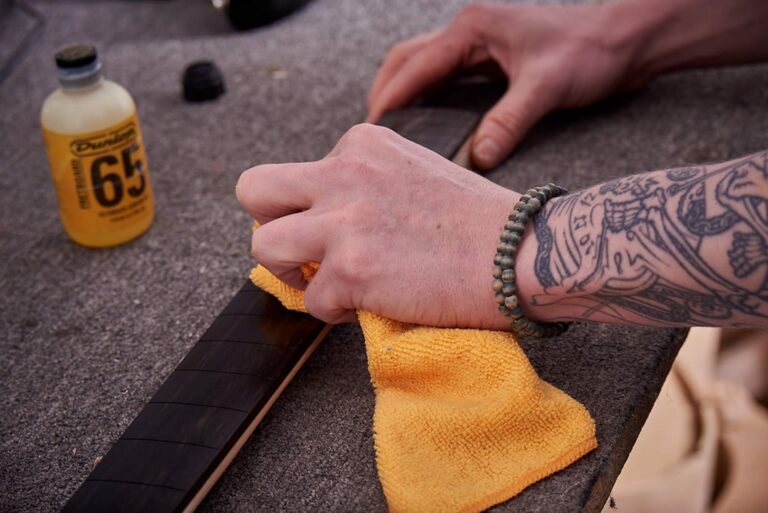
With the fret guard or tape in place and polish ready to go on to the cloth, we will now apply the polish to the fret and quickly rub up and down using a small amount of force.
The focus of our polishing is going to be the entire fret – including the sides. Most of the focus will be on the top, which is the most visible part, but don’t neglect the sides.
While polishing, you may notice that the polish begins to exhibit some discoloration, which is what we want to see. If the polish starts to turn black, that means grime from the fret is mixing into the polish. This is good for us, as it means that the dirt is not on the fret any longer!
- Wipe away the polish.
Next, we’re going to wipe away the newly dirty polish using the same amount of pressure that we used to apply it. Using a cloth or rag, wipe vigorously buff back-and-forth to reveal a lovely new shine on the fret.
If needed, you can repeat the process until you do get a mirror shine. Dirtier frets might need two passes over. Again, do not forget to wipe away any polish that has gone onto the fretboard.
- Continue the procedure on all remaining guitar frets.
Ok, so that’s the first fret out of the way. Depending on your guitar, you might have 22 or 24 frets on which to repeat the above process. From around the 20th fret, the fret wire may become thinner, and the fret guard struggles to sit flush between narrow frets.
So you will be more likely to see polish finding its way onto the fretboard on this part of the neck. Just remember to wipe off any excess polish that does find its way onto the fretboard.
As the strings are off, this is probably an opportunity to clean the fretboard.
If you are interested in doing that, we have an article here at this link that will walk you through the process.
- The Final Results!
Otherwise, now’s the time to restring the guitar. If you’ve worked the full length of the neck, and have hit every fret, making sure to do double passes if needed on particularly dirty guitar frets, then you can admire the final result.
Below, I have included a couple of images of the before and after of my guitar. It looks much better in person, and hopefully, you now have some comparable results on your guitar.
Limitations of This Polishing Method
I should clarify that this method is really for frets that are in good condition that do not have any scratches, burrs, or dents.
Polish by itself will not be abrasive enough to remove any imperfections of this kind, so if you do have these, you’ll need to apply some more rigorous labor initially.
You will also be using sandpaper, buffing compounds, wire wool, and possibly even metal files. At that point, you’ve moved well beyond the job of cleaning and polishing your frets, which is what this particular article covers.
More Involved Methods of Cleaning and Polishing
Unfortunately, at the time of writing, we do not have a guitar to hand that requires the use of sandpapers, buffing compounds, or wire wool. As soon as we have an instrument that fits the bill, we will cover the process. When that is ready, we’ll post the link to it here.
But very briefly, for frets with scratches, dents, and burrs, the rough process would be to tape off the entire fretboard and work the frets initially with some wire wool or a small metal file to get the worst out.
We will then work them with successively finer grades of Emery paper or sandpaper before using a small buffing wheel loaded with a polishing compound.
This process will leave your frets with a mirror finish. You can see that this is a much more involved process and will take several hours, depending on the condition of the frets.
For most guitars, we will not need to do this, and the process and simple steps covered in the main body of this article will bring our frets to that mirror finish we want.